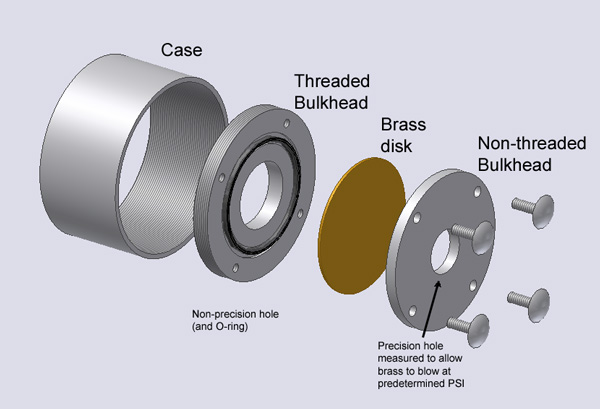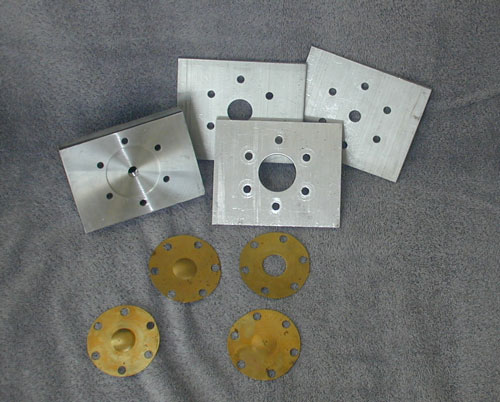

The Precision hole and the thickness of the brass disk are trail-and-error calibrated by hydro-testing. Once a thickness and hole size are determined, the burst PSI should be coarsely repeatable. Offset holes can be machined allowing for the addition of a NPT port and pressure transducer.

Example of trail-and-error calibration materials. Burst PSI for different brass thicknesses and different hole sizes are empirically measured.
This method is not 100% reliable, but should save hardware in many cases.
